Semi hot process soap making is a unique method of creating homemade soap. This technique combines elements of both the cold and hot process methods. It offers a distinct texture and appearance, making it a popular choice for soap makers.
The semi hot process method allows for a rustic, handcrafted look, while still ensuring a fully saponified, safe-to-use soap. This process is a testament to the versatility and creativity inherent in soap making. Let’s take a closer look at this method.
What is Semi Hot Process Soap Making?
Semi hot process soap uses heat to speed up the saponification process, but not as much as in full hot process. It combines elements of the cold and hot process methods, resulting in a uniquely textured soap.
This method offers a balance between the full control of cold process soap and the speed of hot process soap. The semi hot process allows for a more rustic, artisanal look to the soap, while still ensuring a quicker cure time than cold process.
It’s an excellent choice for soap makers seeking to experiment with the characteristics of their homemade soaps.
The Science Behind Semi Hot Process Soap Making
Soap making is a fascinating blend of chemistry and craft. At its core is a chemical reaction known as saponification. This process occurs when a fat, such as olive oil or coconut oil, reacts with an alkali, like sodium hydroxide or potassium hydroxide. The result of this reaction is soap.
In the semi hot process method, the saponification process is given a kick-start with the application of external heat. This heat speeds up the reaction, ensuring that the soap is fully saponified by the time it’s poured into the mold. This is a key aspect of the semi hot process method, and what differentiates it from the cold process method.
Cold Process vs Semi Hot Process vs Hot Process Soap
Soap making methods can be broadly categorized into three types: cold process, hot process, and semi hot process. The main difference between these methods lies in the temperature at which saponification occurs, and the use of an external heat source.
In cold process soap making, the saponification reaction occurs at room temperature. The soap mixture is poured into a mold where it slowly saponifies over a period of 24 to 48 hours.
In contrast, hot process soap making involves applying external heat to speed up the saponification process. This is usually done in a slow cooker or a double boiler.
Semi hot process soap making is a hybrid of these two methods. Like hot process soap, it involves applying heat to speed up saponification. However, the heat is applied for a shorter period, and the soap is allowed to complete saponification in the mold, similar to cold process soap.
This method offers the best of both worlds, allowing for a faster soap making process while still retaining some of the textural characteristics of cold process soap.
Benefits of Choosing Semi Hot Process Soap
Choosing to make semi hot process soap comes with a host of benefits. Compared to commercial soaps, homemade soaps like semi hot process soap are free from harsh chemicals and synthetic detergents. They are made with natural ingredients like olive oil and coconut oil, which are gentle on the skin and provide nourishing benefits.
Semi hot process soap is also beneficial for the environment. By making your own soap, you can reduce plastic waste from soap packaging. Furthermore, you have control over the ingredients used, allowing you to choose sustainable and ethically sourced oils and additives.
Step-by-Step Guide: Making Semi Hot Process Soap
Creating semi hot process soap involves a series of steps. Here’s a detailed, step-by-step guide to help you through the process:
Step 1: Gather and Prepare Your Ingredients
First, assemble all your ingredients. This includes your chosen oils (like olive oil and coconut oil), sodium hydroxide (also known as lye), and distilled water. Measure out each ingredient accurately using a kitchen scale to ensure the correct proportions. Remember, soap making is a precise science, and accurate measurements are crucial for a successful batch.
Step 2: Mix Sodium Hydroxide and Water
Next, slowly add the sodium hydroxide to your distilled water. Never add water to sodium hydroxide as it can cause a violent reaction. Stir the mixture gently until the sodium hydroxide is fully dissolved. This mixture will heat up quickly, so be sure to handle it carefully.
Step 3: Melt Your Oils
While your sodium hydroxide solution is cooling, start melting your oils. You can do this in a slow cooker or a double boiler. Ensure all the oils are fully melted and combined before moving on to the next step.
Step 4: Combine Sodium Hydroxide Solution and Oils
Once your oils are melted and your sodium hydroxide solution has cooled to a safe temperature (usually around 110-130°F), slowly pour the sodium hydroxide solution into the oils, stirring constantly.
Step 5: Blend to ‘Trace’
Use a stick blender to mix the soap batter. You’re aiming to reach ‘trace’, a state where the soap mixture thickens and leaves a visible trail on the surface when drizzled. This can take anywhere from a few minutes to 15 minutes of blending, depending on your recipe and the temperature of your ingredients.
Step 6: Add Extras
Now is the time to add any extras like essential oils, fragrance oils, or colorants. Stir well to ensure these additions are evenly distributed throughout the soap batter.
Step 7: Pour into Mold
Pour the soap mixture into a soap mold. Use a spatula to scrape out any remaining soap from the pot. Smooth the top of the soap with the spatula or a spoon.
Step 8: Let Soap Cool and Harden
Allow the soap to cool and harden. This can take anywhere from a few hours to a day, depending on the size of your mold and the temperature of your room.
Step 9: Cut and Cure Soap
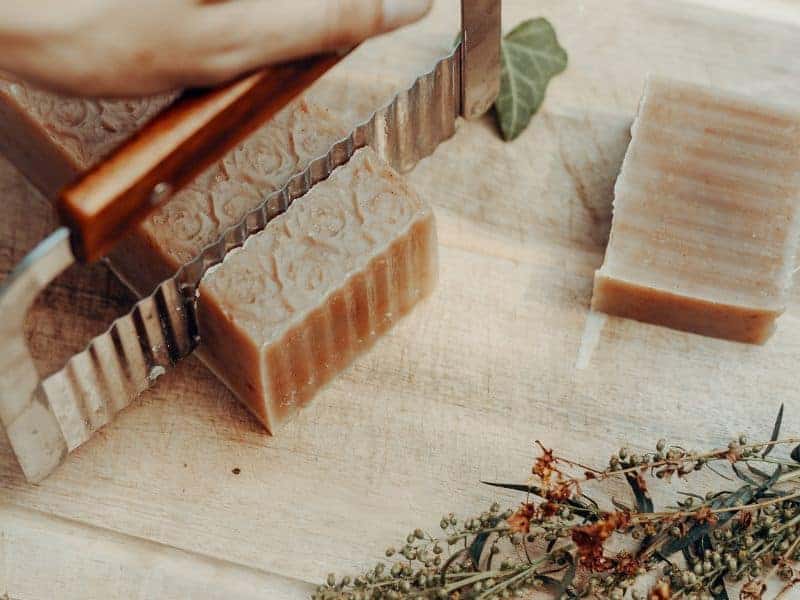
Once the soap is hard enough, remove it from the mold and cut it into bars. These bars will need to cure for several weeks to allow the water to evaporate, resulting in a harder, longer-lasting bar of soap. Place the bars in a cool, dry area with good air circulation to cure.
Safety is paramount when making soap. Always wear protective gear, work in a well-ventilated area, and handle lye with extreme care.
Safety Measures in Making Semi Hot Process Soap
Safety is paramount in soap making. Sodium hydroxide, also known as lye, is a caustic substance that can cause burns if it comes into contact with skin. Always wear protective gear, including gloves and long sleeves, when handling lye.
Work in a well-ventilated area to avoid inhaling fumes, and never leave your soap unattended while it’s cooking. If an accident does occur, such as a lye spill or burn, rinse the affected area immediately with cool water and seek medical attention.
Adding Scents and Colors to Semi Hot Process Soap
One of the joys of soap making is the ability to customize your creations. Essential oils and fragrance oils can be added to your soap to give it a pleasing scent. Essential oils are derived from plants and offer a natural fragrance option, while fragrance oils are synthetic and come in a wider range of scents.
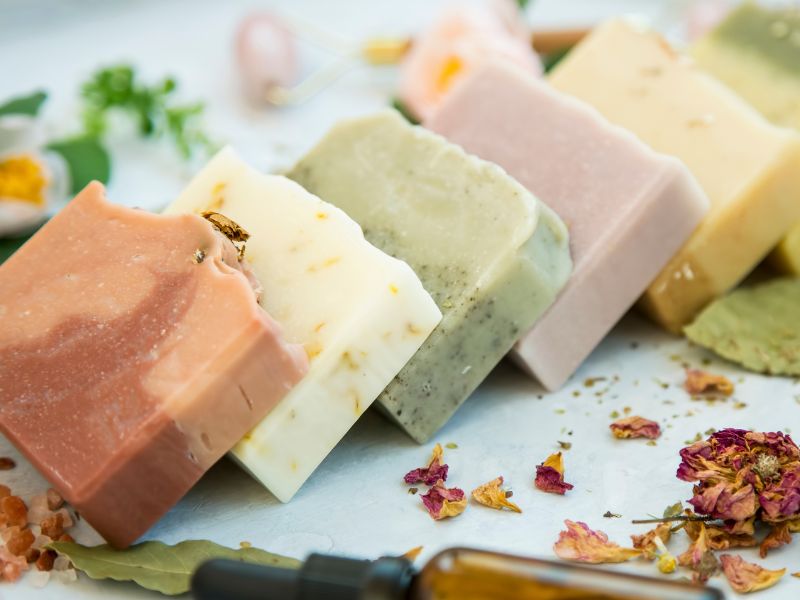
Colors can be added using natural colorants like clays, spices, or plant powders. These can be mixed in at trace to give your soap a beautiful hue. Remember, customization is all about personal preference, so feel free to experiment and find what you like best.
Troubleshooting Semi Hot Process Soap
Soap making is a rewarding craft, but it can come with certain challenges. Here are some common issues you might encounter in semi hot process soap making and how to address them:
Soap Doesn’t Reach Gel Phase
In semi hot process soap making, the gel phase is when your soap heats up and becomes translucent. If your soap doesn’t reach this phase, it could be due to not enough heat being applied during the cooking process. To resolve this, ensure that you’re maintaining a consistent heat source and monitor your soap closely during the cooking stage.
Soap is Too Soft or Crumbly
If your soap turns out too soft or crumbly, it could be due to an imbalance in your oil mixture. Soaps with a high percentage of soft oils, like olive oil, can result in a softer bar. On the other hand, too much lye can lead to a crumbly soap. To fix this, adjust your recipe to include more hard oils, like coconut oil, which can help create a harder bar. Also, ensure that you’re measuring your lye accurately and not adding too much.
Soap Has a White Powdery Layer (Soda Ash)
Soda ash is a white powdery layer that can form on the surface of your soap. It’s harmless and doesn’t affect the soap’s performance, but it can be unsightly. Soda ash typically forms when soap comes into contact with air during the saponification process.
To prevent this, try covering your soap with a piece of plastic wrap or parchment paper immediately after pouring it into the mold. If soda ash does form, it can often be washed or steamed off after the soap has fully cured.
Taking accurate measurements and closely following your soap recipe are key to avoiding these issues. Don’t be discouraged if you encounter challenges along the way.
Each batch of soap is a learning experience, bringing you one step closer to perfecting your semi hot process soap making skills.
How to Store and Cure Semi Hot Process Soap
Curing Your Semi Hot Process Soap
After your semi hot process soap has been cut into bars, it enters the curing stage. This is a crucial step that helps to remove any remaining water from the soap, resulting in a harder bar that lasts longer when used.
Unlike cold process soap, which can take 4-6 weeks to cure, semi hot process soap can be cured more quickly, often within 2-3 weeks. This is because the additional heat used in the semi hot process method accelerates some of the saponification and water evaporation, reducing the overall cure time.
To cure your soap, place the bars in a cool, dry area with good air circulation. You can use a curing rack or simply lay them out on a clean, covered surface. Make sure the bars are not touching each other to allow air to circulate around each one.
Storing Your Semi Hot Process Soap
Proper storage is key to maintaining the quality of your homemade soap. Once cured, your soap bars should be stored in a dry place away from direct sunlight, which can cause the soap to fade or even go rancid over time.
A breathable container, like a cardboard box or a linen bag, is a good option for storage. This allows the soap to continue to harden and dry out, extending its shelf life.
If stored correctly, your homemade semi hot process soap can last for years, retaining its scent and quality. This makes it perfect for personal use, gifting, or even selling.
Tips for Perfecting Semi Hot Process Soap Recipes
Experimenting with Oil Combinations
Improving your semi hot process soap recipe is a journey that requires patience and consistent practice. If your initial attempts don’t turn out as expected, don’t lose heart. Each batch you create is a chance to learn and fine-tune your soap-making skills.
Start by experimenting with various combinations of oils. Try different ratios of olive oil and coconut oil to see how it affects the hardness, lather, and moisturizing properties of your soap. You might also consider adding other oils like castor oil for extra lather, or shea butter for added moisturizing benefits.
Exploring Scents
Next, delve into the world of scents. Essential oils like lavender, peppermint, and citrus can add a refreshing aroma to your soap. Fragrance oils offer a wide range of scents from floral to fruity, sweet to spicy. Try different ones to discover your personal preference.
Adding Colors
Colors can also add a unique touch to your soap. Natural colorants like turmeric for yellow, spirulina for green, or beetroot powder for pink can be used. Experiment with different amounts to achieve the color intensity you desire.
Keeping Detailed Records
Keep a detailed record of each soap batch you make. Write down the exact measurements of oils, lye, and water used, the essential or fragrance oils added, any colorants or additives used, and the curing time.
Also, note down observations about the soap’s texture, lather, hardness, scent, and skin feel. Over time, these notes will help you understand what works best and guide you in crafting a semi hot process soap recipe that’s uniquely yours.
Advanced Techniques in Semi Hot Process Soap Making
Once you’ve mastered the basics, you can explore advanced soap making techniques. These include swirling, layering, and embedding objects into your soap. These techniques can add a beautiful and unique touch to your soap, making it truly one-of-a-kind.
Remember, these techniques require practice and patience. Start simple and gradually increase the complexity of your designs. And as always, safety should be your top priority.
Frequently Asked Questions
The main difference lies in the temperature at which saponification occurs and the use of an external heat source. Cold process soap saponifies at room temperature, hot process soap uses heat to speed up saponification, and semi hot process is a blend of these two methods.
Semi hot process soap has slightly less curing time than cold process soap, it is made with natural ingredients, so it’s gentler on the skin than commercial soaps. It’s also more environmentally friendly, as it reduces plastic waste from soap packaging.
Common issues include soap that doesn’t reach the gel phase, soap that’s too soft or crumbly, or soap that has a white powdery layer on top, known as soda ash. These can often be resolved by ensuring accurate measurements and following the recipe closely.
After the soap has hardened, it should be cut into bars and left to cure for several weeks. This allows any remaining water to evaporate, resulting in a harder, longer-lasting bar. Store the soap in a cool, dry place away from direct sunlight.
The key to great soap making is patience, practice, and a spirit of experimentation. Don’t be afraid to try new things and make mistakes. Each batch of soap is a learning opportunity, bringing you one step closer to perfecting your craft.
Conclusion
In conclusion, making semi hot process soap is a fun and interesting hobby. It’s a special way to make your own soap at home. This soap is good for your skin and good for the environment, too. Plus, you can make it just the way you like it!
Whether you’re new to making soap or you’ve done it before, trying the semi hot process can be exciting. It shows how creative and flexible soap making can be. And who knows? You might even start your own soap business one day!
The most important things in soap making are patience, practice, and not being afraid to try new things. It’s okay to make mistakes. Every time you make soap, you learn something new. This helps you get better and better at making soap.


